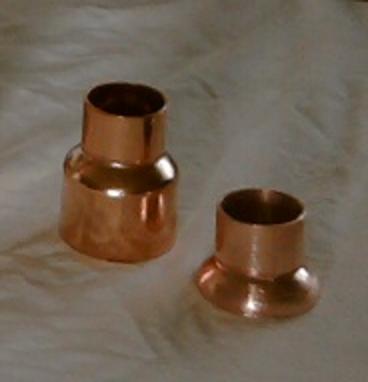
Page 1 of 3

Copper parrot

PostPosted: Tue Mar 22, 2016 10:01 am
by Seagull
Found this on eBay. Is it suitable for use with the T500?

I'm guessing that you let the distillate drip into it, filling up the tube. Do you leave the alcometer permanently in the tube to constantly measure and have a kilner jar to collect the output?

Is this worth having?

Thanks.


http://www.ebay.co.uk/itm/Handmade-Copp ... SwBLlVZs1Y

Re: Copper parrot

PostPosted: Tue Mar 22, 2016 10:47 am
by Benoit
It could be used with pretty much anything that drips into a collecting vessel, it just drips into the parrot first then into the jar. If you have any soldering skills at all you could make that for about £10 though! Have a little search round on here, I'm sure someone had bumped a thread with a full equipment list & construction diagram the other day.

Re: Copper parrot

PostPosted: Tue Mar 22, 2016 1:12 pm
by Seagull
Thanks Benoit but I think the ready made option is best for me. I'd have to buy the tools and ruin several metres of copper before getting it right. And there's no guarantee I'd ever get it right such is my uselessness!

£40 including postage works OK for me. And it looks pretty cool too!

Re: Copper parrot

PostPosted: Tue Mar 22, 2016 2:21 pm
by Spirits4BB
Looks the business.....

Re: Copper parrot

PostPosted: Tue Mar 22, 2016 5:04 pm
by Icefever
Ye spirit gods...please don't pay that much for £5/£10 of copper..

I know you say that you don't do DIY...but you don't need a parrot like this.

Re: Copper parrot

PostPosted: Tue Mar 22, 2016 5:35 pm
by Seagull
Oops! Too late. Ordered it now...

Re: Copper parrot

PostPosted: Tue Mar 22, 2016 6:44 pm
by Benoit
I just ordered the bits to make one from JTM plumbing. I've got enough bits of pipe left over, it's just the big reducing fittings for the collection cup & I'm not fiddling about drilling 8mm into the 22mm upright either I'm going to use a reducing tee. I'll cap the bottom of the tee & drill into some wood as a base, if the hole is slightly snug then it should all stay standing :D
I'd love to know how many that guy sells on eBay, I'm sure mine won't be as ornate but I could undercut him by half haha!

Re: Copper parrot

PostPosted: Tue Mar 22, 2016 9:11 pm
by YHB
Image

Just made from pipe & a jam jar, no fittings. The large cups are from 22mm pipe - split, flattened and knocked into shape with a hammer.

Materials were all from the scrap bin, but less than £5.00 if you bought them.

Re: Copper parrot

PostPosted: Tue Mar 22, 2016 10:17 pm
by hampk
YHB wrote:Image

Just made from pipe & a jam jar, no fittings. The large cups are from 22mm pipe - split, flattened and knocked into shape with a hammer.

Materials were all from the scrap bin, but less than £5.00 if you bought them.


That is a thing of beauty..

Re: Copper parrot

PostPosted: Wed Mar 23, 2016 4:48 am
by Easydrinker
YHB is a man that works hard to save a penny, and seems to finish with products that look like they cost many pounds.
He also manages to mod on one forum and still guest on others, something that I currently struggle to find time for.
I have managed to give up the cigareets,but the whisky and wild, wild women take up far too much of my time! :)

Robert.

Re: Copper parrot

PostPosted: Wed Mar 23, 2016 5:00 am
by Myles
Benoit wrote:I'm going to use a reducing tee. I'll cap the bottom of the tee & drill into some wood as a base, if the hole is slightly snug then it should all stay standing :D


I hope you don't mind a hint. Don't do that or you will end up with a pool of distilate in the bottom of the T that will cause problems.

I assume you are using 22 mm for the vertical tube (hydrommeter reservoir). get yourself a 22 male to smaller female reducing fitting and then cut down the male part to just a few mm long.

Similar to this. This is 54 mm but the principle is the same.

c1a.jpg
c1a.jpg (10.9 KiB) Viewed 2212 times


Solder this to the thinner tube that you will be using for the liquid input tube and then pass it into the T and out the branch. Push this guy down into the T and then when you put in the bigger tube you can solder them all at the same time. You then just need to solder the inlet tube into the branch. I use another reducer for convenience but it is up to you.

parrot base.png


That way there is no pool of liquid. If you then use a circular saw the same size as the bottom section of the T it cuts a trough that the T just slides into so you can glue it in place.

This was an early prototype made out of spare fittings and bits of tube.

Photo004b.jpg

Re: Copper parrot

PostPosted: Wed Mar 23, 2016 5:26 am
by Myles
One last hint.
Get a small bit of copper or stainless mesh and push it down into the bottom of the parrot.

I have broken 2 hydrometers by dropping them into an empty parrot, and the packing acts as a shock absorber.

Re: Copper parrot

PostPosted: Wed Mar 23, 2016 8:32 am
by Benoit
Thanks myles, that's certainly neater than what I was going to be doing....I will be cursed by every skilled metal worker the world over for this but my solution to prevent the pooling was going to be filling that end of the tee with solder & letting it set ::)

@YHB - Brian, how on earth did you shape those cups? Much skill & patience it's beautiful; we may have to dub you the parrot tamer, both mechanical & electrical!

Re: Copper parrot

PostPosted: Wed Mar 23, 2016 9:37 am
by Spirits4BB
Beautiful...........
Image

Is that a copper base on the jar that was the lid?

Re: Copper parrot

PostPosted: Wed Mar 23, 2016 10:23 am
by Seagull
So jealous of the skills you guys have in self build